Thinking about transforming your concrete space into a vibrant, cushioned gym area? Installing rubber gym flooring can be the game-changer you need.
Not only does it provide safety and comfort, but it also enhances the look and feel of your workout zone. You might be wondering if this is a job you can tackle yourself. The good news? With the right guidance, you absolutely can.
This article will walk you through the process, step by step, ensuring you avoid common pitfalls and achieve a flawless finish. Ready to make your fitness area both functional and stylish? Let’s dive into how you can seamlessly install rubber gym flooring on concrete, turning your space into the ultimate exercise haven.
Benefits Of Rubber Gym Flooring
Rubber gym flooring offers a range of benefits for concrete surfaces. It enhances the functionality and aesthetics of any gym space. This flooring is popular for its durability, safety, and noise reduction features. Let’s explore these benefits.
Durability And Resilience
Rubber gym flooring withstands heavy weights and intense workouts. It is designed to last for many years. It resists wear and tear from equipment and foot traffic. This makes it ideal for high-impact activities. Its resilience means less maintenance and fewer replacements.
Safety And Comfort
Rubber flooring provides a non-slip surface. This reduces the risk of injuries during workouts. It offers cushioning that absorbs shocks. This helps protect joints from strain. The soft texture ensures comfort during floor exercises. You can exercise confidently and safely.
Noise Reduction
Rubber flooring minimizes noise from equipment drops and footsteps. It absorbs sound and reduces echoes in gym spaces. This creates a quieter environment. It helps maintain focus during workouts. Enjoy a peaceful gym experience with rubber flooring.
Preparing The Concrete Surface
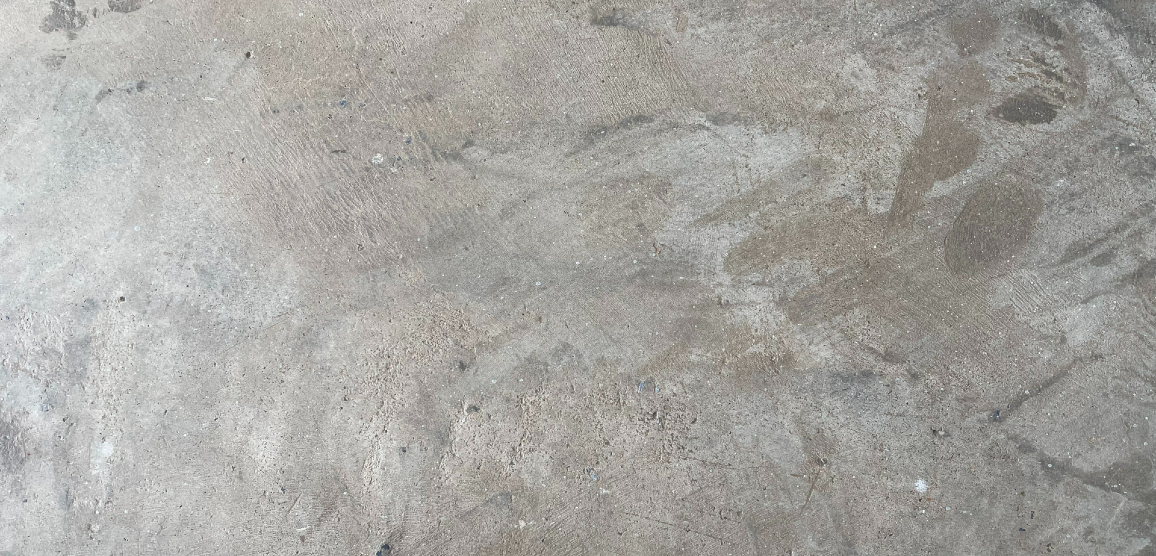
Ensure the concrete surface is clean and dry before installing rubber gym flooring. Remove debris and fill cracks for a smooth base. This preparation ensures a secure and even installation, enhancing durability and performance.
When it comes to installing rubber gym flooring on concrete, the preparation of the surface is crucial. A well-prepared concrete surface ensures that your flooring lasts longer and provides a safe environment for your workouts. Imagine spending hours installing your flooring only to find it lifting or cracking due to improper preparation. Let’s dive into the essentials of getting your concrete ready before laying down that rubber matting.Cleaning The Area
Start by clearing the space of all debris. Use a broom or vacuum to remove dust and dirt. A clean surface prevents the rubber from trapping particles underneath, which could lead to uneven flooring or damage over time. Consider using a damp mop with a mild detergent for any stubborn grime. Just ensure the concrete is dry before moving to the next step. Have you ever noticed how a small pebble under your mat can become a big annoyance during a workout?Repairing Cracks
Inspect the concrete for any visible cracks. Even minor cracks can lead to significant issues later. Use a concrete repair kit to fill these gaps. A smooth surface is not just about aesthetics; it’s about safety and longevity. Think of cracks as the tiny leaks in a boat – if left unchecked, they can sink your ship. Is there a crack that has always bothered you? Now’s the time to fix it before it becomes a bigger problem.Ensuring Level Surface
Finally, ensure your concrete surface is level. Use a leveling compound if needed. Uneven surfaces can cause your rubber flooring to wear unevenly and create trip hazards. Grab a level tool and check different areas of the concrete. Even if it feels flat, a slight incline can affect performance. Have you ever tripped over an unexpected bump during a workout? Let’s prevent that from happening in your gym space. Preparing your concrete surface is more than just a task; it’s an investment in the durability and safety of your gym flooring. Are you ready to create the perfect foundation for your workouts?Choosing The Right Rubber Flooring
Choosing the right rubber flooring for your gym can make or break the workout experience. Whether you’re setting up a personal gym in your garage or outfitting a commercial space, the flooring you select plays a crucial role in comfort, safety, and aesthetics. With numerous options available, it’s essential to understand the different types, thickness considerations, and color and design options to make an informed decision.
Types Of Rubber Flooring
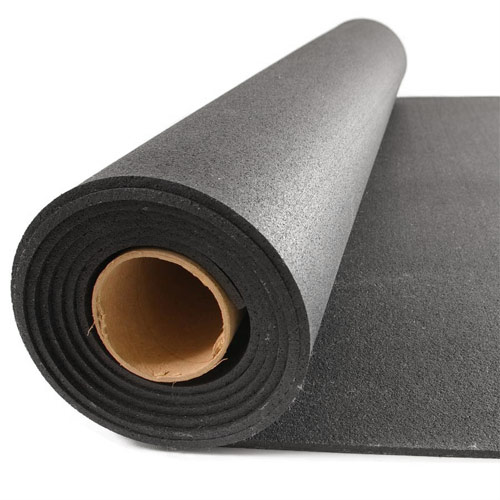
Rubber flooring comes in various forms, each offering unique benefits. Roll-out mats are a popular choice for seamless coverage and easy installation. They’re excellent for larger areas as they reduce the number of seams.
Interlocking tiles, on the other hand, offer flexibility and ease of handling. They’re ideal for DIY enthusiasts since you can install them without adhesives. You can rearrange them as needed, which is perfect for evolving gym layouts.
Rubber mats are another option, providing excellent shock absorption and durability. They’re perfect for weightlifting areas where dropping heavy weights is common. Each type serves different needs, so consider your gym’s purpose and layout before choosing.
Thickness Considerations
Thickness is a key factor in rubber flooring selection. Thicker flooring offers superior cushioning and sound insulation. This is beneficial if your gym is located in a shared building or near residential areas.
Standard thickness ranges from ¼ inch to ¾ inch. For general gym activities like cardio and light weightlifting, ¼ inch is sufficient. However, for heavy lifting zones, opt for ½ inch or thicker to protect your concrete and minimize noise.
Consider the equipment you’ll use and the intensity of the workouts. The right thickness ensures safety and comfort, enhancing your gym experience.
Color And Design Options
Rubber flooring doesn’t have to be boring black. Many manufacturers offer a range of colors and patterns. You can create a vibrant and motivating environment with bright colors or keep it sleek with neutral tones.
Custom designs allow you to incorporate logos or specific patterns that reflect your personal style or brand identity. This can make your gym more inviting and unique.
While choosing colors, think about how they affect mood and energy levels. Would a bold red inspire more energy, or would a calming blue help maintain focus? Your choice of color can influence your gym’s atmosphere and your workout sessions.
Consider these factors carefully to select the perfect rubber flooring for your gym. What type, thickness, and color will best suit your fitness space? Your choices will impact the overall functionality and feel of your gym, so choose wisely!
Credit: www.greatmats.com
Gathering Necessary Tools And Materials
Before starting, gather tools like a measuring tape, utility knife, and adhesive. Ensure materials include rubber tiles and safety gear. Having everything ready makes installation smooth and efficient.
Installing rubber gym flooring on concrete is a project that requires careful preparation. Before you start laying down the tiles, it’s crucial to gather the necessary tools and materials. This will ensure a smooth and efficient installation process, saving you both time and frustration. Let’s explore what you need to get started.Essential Tools
To begin your project, you’ll need some essential tools. A utility knife with a sharp blade will be your best friend for cutting the rubber tiles to fit perfectly in your space. A straightedge or a long ruler helps in achieving clean, straight cuts. A measuring tape is essential for accurate measurements, ensuring you order the right amount of flooring. Have a chalk line handy to mark guidelines on the concrete. This will help keep your installation straight and organized. Don’t underestimate the power of a rubber mallet. It helps to secure the tiles snugly without damaging them. Do you have these tools at hand, or do you need to make a trip to the hardware store?Adhesives And Sealants
Choosing the right adhesives and sealants is vital for the longevity of your gym flooring. Depending on the thickness of the rubber and the condition of your concrete, you might use a pressure-sensitive adhesive. This type of adhesive allows for some repositioning, which is handy during installation. A contact adhesive is another option. It provides a stronger bond but requires more precision, as it doesn’t allow for repositioning. Make sure to follow the manufacturer’s instructions carefully. Once your flooring is installed, using a sealant can protect the edges and joints from moisture and wear. It’s like adding an extra layer of armor to your flooring. Have you considered which adhesive and sealant will work best for your specific situation? By carefully gathering these tools and materials, you set a solid foundation for your gym flooring installation. Each item on your list plays a crucial role in the overall success of your project. Ready to transform your concrete space into a functional and stylish gym?Installation Process
Installing rubber gym flooring on concrete is a straightforward task. This process ensures a durable and safe surface for workouts. The key is careful planning and precise execution. Follow the steps below to achieve a professional finish.
Measuring And Cutting
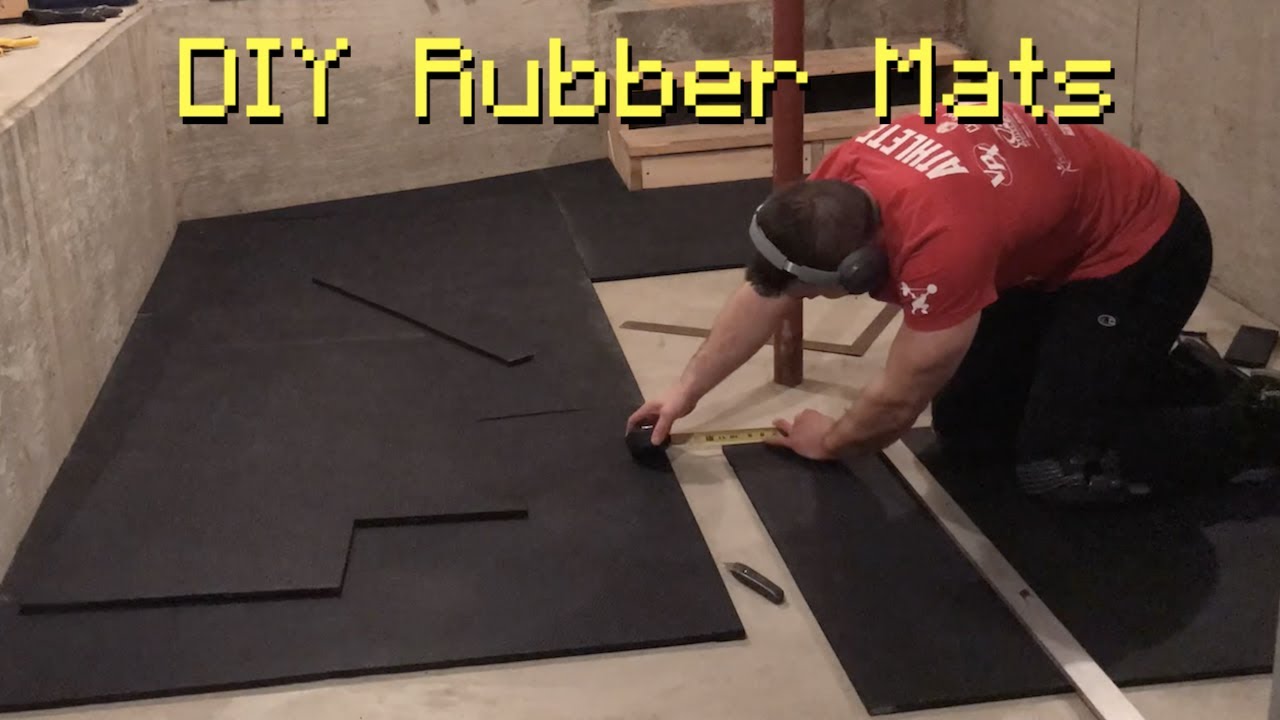
Start by measuring the room’s dimensions. This helps determine the amount of flooring needed. Use a tape measure for accuracy. Record the length and width of the space. Purchase slightly more material than calculated. This accounts for errors or adjustments. Once materials are ready, move to cutting. Use a utility knife for clean edges. Cut the rubber tiles or rolls to fit your room’s dimensions. Ensure all pieces are cut before moving to layout.
Laying Out The Flooring
Begin laying the rubber flooring from one corner. Align the edges with the walls. Lay each piece snugly against the other. This reduces gaps between tiles. Continue until the floor is fully covered. Check alignment regularly. Adjust pieces as needed. This ensures a seamless look.
Securing With Adhesive
Once the layout is complete, secure the flooring. Use a suitable adhesive for rubber. Apply it according to the manufacturer’s instructions. Spread adhesive evenly across the concrete. Press each tile firmly into the adhesive. This prevents movement during use. Allow the adhesive to dry completely before using the floor. This ensures a strong bond.
Credit: www.youtube.com
Finishing Touches
After laying down rubber gym flooring on concrete, the final steps ensure durability. Finishing touches make the flooring look polished and professional. Proper sealing and cleaning are key.
Sealing The Edges
Sealing the edges prevents dirt from creeping underneath. Use adhesive to secure the edges firmly. This keeps the flooring in place during workouts. A tightly sealed edge also reduces trip hazards. Check all corners and seams for gaps. Add extra sealant where needed for a snug fit.
Cleaning And Maintenance Tips
Regular cleaning prolongs the life of your gym flooring. Sweep the surface to remove dust and debris. Use a mild soap solution for deeper cleaning. Avoid harsh chemicals that may damage the rubber. Wipe spills immediately to prevent stains. Establish a routine cleaning schedule for best results.
Troubleshooting Common Issues
Installing rubber gym flooring on concrete can be tricky. Ensure a clean surface to avoid bumps. Use adhesive for secure placement, and allow it to dry thoroughly. Properly aligning tiles prevents gaps and ensures a smooth finish.
Installing rubber gym flooring on concrete can be a game-changer for your workout space. However, it’s not uncommon to encounter a few bumps along the way. Troubleshooting common issues is crucial to ensure your flooring stays in top condition. Whether it’s air bubbles or uneven surfaces, knowing how to address these problems can make all the difference.Dealing With Air Bubbles
Air bubbles can be frustrating, but they’re not insurmountable. They often occur when the rubber isn’t properly adhered to the concrete. To fix this, apply pressure to the bubble using a rolling pin or a floor roller. This action helps to push the air out and ensure the rubber lays flat. If persistent bubbles remain, you might need to lift the affected area and reapply adhesive. Be sure to smooth it out gradually. Have you ever wondered why bubbles form despite careful installation? It might be humidity or uneven adhesive application.Adjusting Uneven Surfaces
Uneven surfaces can lead to discomfort and safety hazards during workouts. If you notice your flooring isn’t level, check the concrete base first. Any debris or cracks should be addressed before laying the rubber. You can use a leveling compound to smooth out irregularities. Once the surface is even, lay down the rubber flooring again. Have you considered using a spirit level to check the evenness? It’s a handy tool that ensures precision. Sometimes, the rubber itself might be uneven due to manufacturing variances. If this is the case, cutting and trimming the edges might be necessary to achieve a seamless finish. Remember, a well-leveled floor not only enhances your workout experience but also protects your equipment from damage. Encountering these issues is common, but armed with the right tools and knowledge, you can tackle them head-on. What other challenges have you faced in your DIY projects?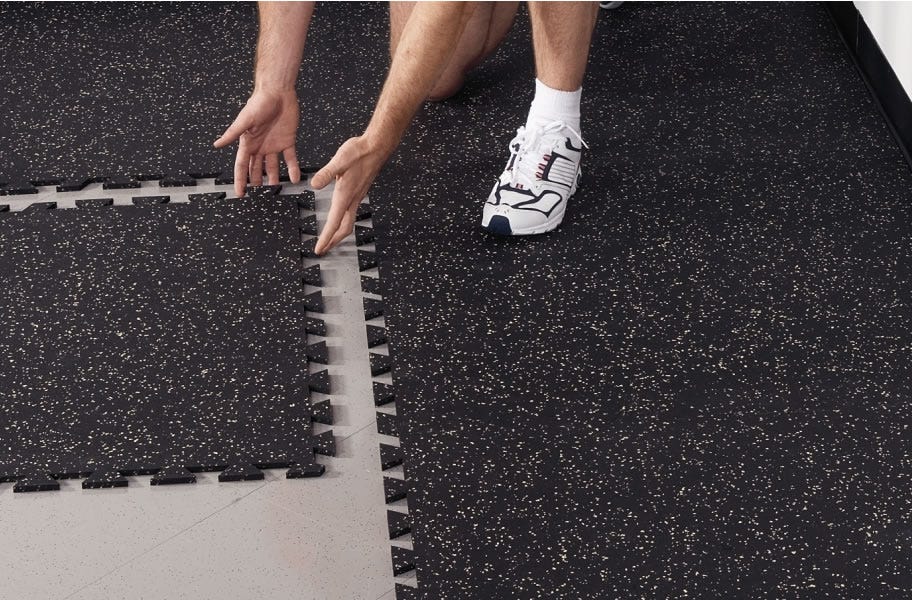
Credit: www.flooringinc.com
Frequently Asked Questions
Can You Put Rubber Gym Flooring Over Concrete?
Yes, you can install rubber gym flooring over concrete. Rubber provides cushioning, sound reduction, and durability. Ensure the concrete surface is clean and level before installation. Rubber tiles or rolls are easy to lay and offer excellent grip. It’s an ideal choice for home or commercial gyms.
How To Stick Rubber Flooring To Concrete?
Clean and dry the concrete surface thoroughly. Apply adhesive evenly using a notched trowel. Press the rubber flooring firmly onto the adhesive. Roll the flooring with a weighted roller to ensure a strong bond. Let it cure for the recommended time before use.
Should I Glue Down Rubber Gym Flooring?
Gluing down rubber gym flooring isn’t always necessary. Interlocking tiles and mats often stay secure without adhesive. Glue provides stability for heavy equipment areas. Consider room use and future removability before deciding.
How To Install Rubber Flooring In A Gym?
To install rubber flooring in a gym, first clean the subfloor thoroughly. Measure and cut the rubber tiles or rolls to fit. Apply adhesive or double-sided tape, then lay the flooring, ensuring a snug fit. Press down firmly to secure.
Allow the adhesive to cure before use.
Conclusion
Installing rubber gym flooring on concrete is simple and effective. It enhances safety and comfort. Start with clean, dry concrete. Measure your space carefully. Choose quality rubber tiles or rolls. Follow manufacturer’s instructions for a secure fit. Use adhesives if needed for stability.
Ensure edges align perfectly. Trim excess with a utility knife. Check for gaps or bubbles. Enjoy a safer, quieter gym environment. Maintenance is easy with regular cleaning. This flooring choice is great for fitness lovers. It supports workouts and protects floors.
A smart investment for any home gym setup.