Are you tired of worrying about scratches and dents on your beautiful hardwood floor every time you set up your workout space? Installing a gym mat on hardwood might just be the perfect solution for you.
Not only does it protect your floor, but it also provides a cushioned, non-slip surface that can enhance your workouts. But how do you ensure a seamless installation that doesn’t damage your floor or your nerves? In this guide, you’ll discover simple, step-by-step instructions designed to make the process easy and stress-free.
So, grab your gym mat and let’s get started on transforming your workout area into a safe, efficient space that you’ll love using every day.
Choosing The Right Gym Mat
Installing a gym mat on hardwood requires careful placement to protect the floor. Ensure the surface is clean and dry. Unroll the mat, align it with the edges, and press firmly to avoid wrinkles. This ensures a safe and durable workout space.
Choosing the right gym mat for your hardwood floor is crucial for both performance and protection. Have you ever thought about how a simple mat can enhance your workout experience? A well-chosen gym mat can prevent damage to your hardwood, provide comfort during your exercises, and reduce the risk of injury. Let’s dive into what you need to consider when selecting the perfect mat for your home gym.Material Considerations
When selecting a gym mat, the material is a key factor. Rubber mats offer excellent durability and cushioning, making them a popular choice. They are also easy to clean and resistant to moisture. Foam mats, on the other hand, are lighter and often more affordable. They provide good shock absorption, which is great for activities like yoga or pilates. However, they might wear out faster with high-impact exercises. Think about your workout style. Do you need a mat that can withstand heavy weights? Or is comfort your priority for floor exercises? Your activities will guide you in choosing between rubber, foam, or even PVC mats.Thickness And Durability
The thickness of your gym mat can greatly impact your exercise routine. A thicker mat provides more cushioning, which is essential for high-impact workouts. It protects your joints and adds comfort, especially during floor exercises. Durability is also important. Imagine investing in a mat that starts to tear after a few sessions. Look for mats with a higher density for longevity. A 3/8 inch thick mat is often a good starting point for most home gyms. Will your mat handle the intensity of your workouts? Consider both thickness and durability to ensure your mat lasts through your fitness journey.Safety Features
Safety should never be compromised. Consider mats with non-slip surfaces to prevent accidents during your workouts. This is especially crucial on hardwood floors, which can be slippery. Edge safety is another factor. Mats with beveled edges can prevent tripping and ensure a smoother transition when stepping on or off the mat. Reflect on your safety needs. How will your mat perform in keeping you and your floor protected? Choose a mat that offers the features necessary to maintain a safe workout environment. Selecting the right gym mat involves careful thought about material, thickness, and safety. These considerations not only enhance your workout but also protect your cherished hardwood floor. What features are most important to you when choosing a gym mat?
Credit: www.tvs-sportssurfaces.com
Preparing The Hardwood Floor
Preparing your hardwood floor is the first step to installing gym mats. It ensures longevity and safety. A clean and well-assessed floor provides a solid foundation.
Cleaning The Surface
Start by removing dust and debris. Use a soft broom or vacuum. Avoid harsh chemicals. They can damage the wood. A mild detergent with warm water works well. Use a damp cloth for stubborn spots. Ensure the floor is completely dry. Moisture can lead to damage.
Assessing Floor Condition
Check for scratches or dents. They affect the mat’s grip. Small damages can be fixed with wood filler. Larger issues may need professional help. Evaluate the floor’s level. Uneven surfaces can cause accidents. Use a level tool for accuracy. A smooth surface is essential for stability.
Tools And Materials Needed
Installing gym mats on hardwood floors requires specific tools and materials. Using the right equipment ensures a secure and neat installation. This guide will help you gather what you need for the task. Let’s explore essential tools and additional supplies that will make your installation process smooth and effective.
Essential Tools
Having the right tools is crucial for a successful installation. Start with a tape measure. This helps in getting accurate measurements of your gym space. A utility knife is also essential. It allows you to cut the mats to fit perfectly. Another important tool is a straightedge or ruler. It helps in making precise cuts. A rubber mallet is useful too. Use it to gently tap the mats into place.
Additional Supplies
In addition to tools, some supplies are needed. Double-sided tape is a must. It helps keep the mats in place on the hardwood. Consider using a floor cleaner. This ensures the hardwood is clean before laying the mats. A soft cloth or mop can help in this cleaning process. Also, having some spare gym mats is wise. They can be used for replacements if needed.
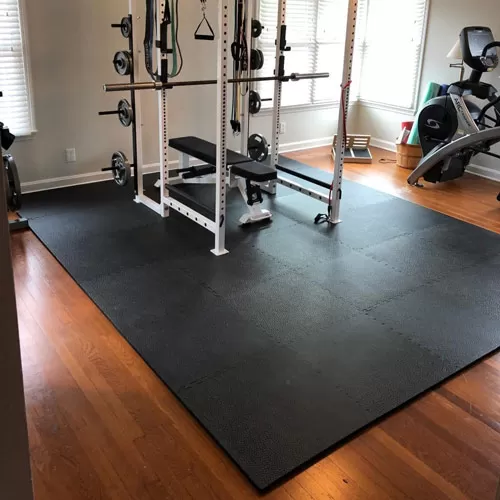
Credit: www.greatmats.com
Measuring And Cutting The Mat
Installing gym mats on hardwood floors is a task that requires precision. It’s not just about laying down the mats; measuring and cutting them correctly is crucial for a perfect fit. An ill-fitted mat can lead to uneven surfaces, which could be a safety hazard during workouts. Let’s dive into the essential steps you need to follow for measuring and cutting your gym mat effectively.
Accurate Measurements
The first step is taking precise measurements of the area where you intend to place your gym mat. Use a tape measure to determine the length and width of the space. Jot down these numbers, rounding up to the nearest inch to ensure full coverage.
Consider any furniture or obstructions that might require adjustments. If there are irregular shapes, measure each segment separately. Accurate measurements can save you from buying excess material or, worse, falling short.
Remember the age-old saying: measure twice, cut once. Before cutting, double-check your numbers. It’s much easier to adjust on paper than with a partially cut mat.
Cutting Techniques
Once you have your measurements, it’s time to cut the mat. Use a utility knife with a sharp blade for clean cuts. A dull blade can tear the material, leading to jagged edges that look unprofessional.
Place the mat on a flat, stable surface. Use a straight edge or a ruler to guide your cuts. This will help you maintain a straight line, ensuring each piece fits snugly together.
If you’re nervous about making mistakes, practice on a scrap piece first. This will give you the confidence and technique needed for the actual mat. Have you ever noticed how practice can make even the most daunting tasks easier?
After cutting, lay the pieces in place without securing them to see how they fit. This dry run can reveal any necessary adjustments before the final installation.
Taking these careful steps in measuring and cutting can transform your gym space, ensuring safety and aesthetics. So, are you ready to tackle this project with precision and care?
Securing The Mat On Hardwood
Securing gym mats on hardwood involves careful preparation. Start by cleaning the surface thoroughly to ensure proper adhesion. Use non-slip pads or adhesive tape to keep the mat in place, preventing slips during workouts.
Securing a gym mat on hardwood can be a bit of a challenge. You want your mat to stay firmly in place during a workout, but you also need to protect your beautiful hardwood floors. Finding the right balance ensures safety and maintains the integrity of both the mat and the floor. Here are some effective methods to secure your gym mat without damaging your floor.Using Adhesives
Adhesives can be a reliable way to keep your gym mat from sliding. Double-sided tape is a popular choice because it offers a strong grip without being permanent. Simply peel and stick the tape to the underside of the mat at the corners and along the edges. If you’re worried about residue on your hardwood, opt for adhesives specifically designed for floors. These products are usually residue-free and gentle on surfaces. Always test a small area first to ensure compatibility. Another option is using adhesive strips that are removable. They provide a firm hold and can be easily peeled off without leaving marks. This is especially useful if you plan to move your mat frequently.Non-slip Options
If adhesives aren’t your thing, non-slip options could be the answer. A non-slip rug pad placed under the mat can prevent unwanted movement. These pads add a layer of cushioning and protect the floor from scratches. Consider mats with a built-in non-slip backing. They stay put during vigorous exercises and eliminate the need for additional products. Plus, they offer convenience and simplicity. Non-slip sprays are another alternative. These sprays create a tacky surface on the bottom of the mat, enhancing grip. Just ensure the spray is safe for hardwood floors before applying. What method appeals to you the most? Whether you choose adhesives or non-slip solutions, it’s crucial to secure your gym mat effectively. This not only enhances your workout experience but also protects your investment in both the mat and your hardwood floors.Maintaining Your Gym Mat
Placing gym mats on hardwood involves careful preparation. Start by cleaning the floor thoroughly to avoid damage. Ensure the mat lies flat, and secure it with non-slip pads to prevent movement during workouts.
Maintaining your gym mat on a hardwood floor is crucial to ensure its longevity and effectiveness. A well-maintained mat not only enhances your workout experience but also protects your hardwood from potential damage. While it might seem like an extra chore, proper maintenance can save you money in the long run and keep your workout space looking pristine. Let’s dive into some practical tips to keep your gym mat in top shape.Cleaning Tips
A clean mat is a happy mat. Regularly cleaning your gym mat can prevent unpleasant odors and extend its life. Use a gentle cleanser or a mixture of water and mild soap to wipe it down after each workout. You can use a soft cloth or sponge to scrub it lightly. Pay special attention to any stubborn spots or stains. Don’t forget to let it dry completely before rolling or folding it away.Preventing Wear And Tear
Preventing wear and tear on your gym mat is easier than you might think. Start by placing your mat on a clean, dry surface to avoid unnecessary friction. Move the mat around occasionally to prevent indentations from forming in one spot. Consider using a mat that is specifically designed for hardwood floors. These mats often have extra cushioning and grip to reduce movement and protect both the mat and the floor. Have you thought about using a rug pad underneath your mat to add an extra layer of protection? Keep an eye on the edges and corners of your mat. If you notice any fraying, trim it promptly to prevent further damage. A little attention to detail can go a long way in maintaining your mat’s condition. By following these simple steps, your gym mat can continue to serve its purpose effectively for years. What are your favorite tips for keeping your workout space clean and functional?Troubleshooting Common Issues
Installing gym mats on hardwood floors can be tricky. You want stability but also need to protect the surface beneath. Despite your best efforts, issues can arise. Let’s tackle some common problems you might face.
Mat Slippage
Slipping mats can be a real headache during workouts. Imagine doing a yoga pose and suddenly sliding across the floor—frustrating, right?
To prevent this, consider adding a non-slip underlay. It’s like putting brakes on your mat. These underlays grip both the mat and the hardwood, keeping everything in place.
Another quick fix is using double-sided tape. Just a few strips can secure the mat effectively. However, make sure the tape doesn’t leave residue on your beautiful hardwood.
Have you tried rubber-backed mats? They naturally resist slipping. If you’re using regular mats, swapping them for rubber-backed versions could be a game-changer.
Surface Damage
Hardwood floors are prone to scratches and dents. You certainly don’t want your gym mat to contribute to this. Have you noticed any marks or scuffs after installing your mat?
A simple solution is to place a thin fabric layer under the mat. This acts as a buffer between the mat and the floor. It’s an easy, cost-effective way to prevent damage.
Check the mat’s underside. Sometimes sharp edges or rough surfaces cause harm. If you detect anything, consider sanding the edges or opting for mats with smoother finishes.
Are you worried about moisture? Sweaty workouts can lead to damp mats, which might affect your hardwood. Ensure your mat is moisture-resistant, or dry it regularly to prevent any damage.
Addressing these issues not only protects your floor but also enhances your workout experience. Have you faced any other challenges with gym mats on hardwood? Share your insights in the comments!
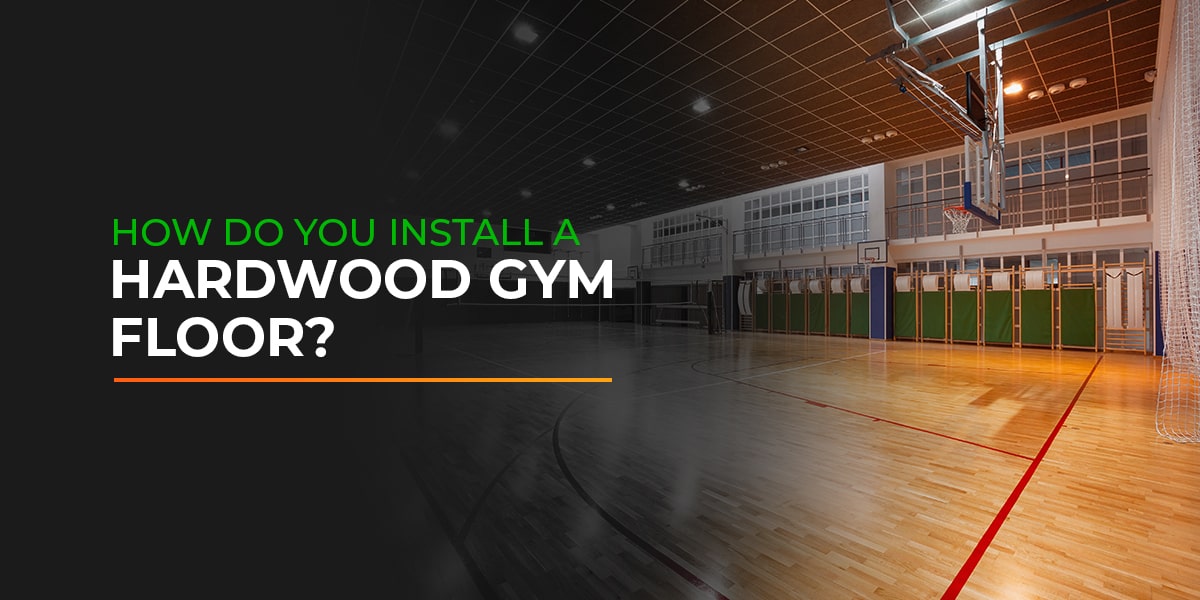
Credit: www.cbasports.com
Frequently Asked Questions
How To Keep An Exercise Mat From Sliding On Hardwood Floors?
Place a non-slip rug pad or yoga mat gripper under the exercise mat. Clean the floor and mat regularly. Use double-sided tape or Velcro strips for extra grip. Avoid using mats with worn-out or smooth surfaces. Check the mat’s material compatibility with hardwood to prevent damage.
Can You Put Rubber Mats On Hardwood Floors?
Yes, you can put rubber mats on hardwood floors. Ensure they have a non-slip backing to protect against scratches. Regularly check for any trapped moisture to prevent damage. Use mats specifically designed for hardwood floors to maintain their condition.
Do You Glue Down Gym Flooring?
Gym flooring can be glued down for stability. Glue prevents movement and provides a seamless look. Consider using high-quality adhesive for durability. Installation varies based on material and room conditions. Always follow manufacturer instructions for best results. Proper adhesion ensures safety and longevity of your gym flooring.
How To Secure Gym Mats To Floor?
Use double-sided tape or adhesive to secure gym mats. Place tape around edges and corners for stability. Ensure the floor is clean before application for better adhesion. Velcro strips can also be used for temporary setups. Regularly check and adjust for safety.
Conclusion
Installing a gym mat on hardwood is straightforward and rewarding. First, clean the floor to remove dust. Then, measure the area carefully. Align the mat edges with precision. Use adhesive tape to secure the corners. This prevents slips and keeps the mat stable.
Always check for gaps to avoid accidents. Regular cleaning helps maintain the mat’s condition. With these steps, your workout space will be safe and comfortable. Enjoy exercising on your new setup.